Saturday, November 28, 2009

RGR014 - No More Dragons

Stage four, the Fortress stage, is much more technologically advanced than the previous stages. Human and mutant enemies have been all but completely replaced with various attack robots, and the floor and walls have that fresh, clean, metallic look to them. The floor layout is also more confusing, requiring several trips between the two floors in different places in order to find all the necessary keys. At one point, I reached a locked door that looked like it was going to lead to a premature boss battle, but since I had no key, I had to explore the last few rooms I hadn't yet visited. Surprisingly, I wound up finding a boss anyway.

Oh, before I forget: I don't know if the bosses have names; the names I'm using for them are just names I'm making up as I go along. I do that sometimes, you know.

Can your missiles beat my flamethrower?
Number 5 is alive!
Number 5 is alive!

Yeah, I walk through walls. Got a problem with that?
Yeah, I walk through walls.
Got a problem with that?
What a waste of barrels.


Final Sub-Boss: Heavy Walker

The first of two final bosses, the Heavy Walker is capable of vertical movement, like the tank from stage two. However, this thing is much faster on its feet. Luckily, it can be stopped in its tracks if the legs take enough damage. It has a front-mounted gun that is only a threat if you stand directly in front of it, so I concentrated on the legs and worried about the gun once the walker was grounded.

The real trouble with the Heavy Walker is its shoulder-mounted plasma gun-type things, which launch a volley of bullets into the air, only to have them all suddenly come hurtling right at you. They have a maximum range, though, and since my gun was powered up to its full range, I was able to stand all the way to one side of the room and pick off one gun from just outside the spot where the gun's shots dissipated. After doing the same on the other side with the other gun, an eye-like object on top of the walker began to flash. I was afraid it might be a self-destruct mechanism, so I rushed back to the walker's side and opened fire until the whole thing went up in flames.

I should maybe get out of the way.
That was disappointing.

Immediately after defeating the Heavy Walker, I found myself in a room with the final key that I needed to access the locked door I found earlier. After picking up a couple of medpacks on the other side, I proceeded into the final boss room.

Final Boss: Supercomputer

The heavily-armed Supercomputer was initially more bark than bite, with its giant movable heat-seeking missile launchers. Since only one missile can appear at a time, and missiles can be shot down easily, I made short work of both launchers. This exposed a central gun that I destroyed in no time. Next up were two small domes on the upper section of the Supercomputer that looked a bit like flood lights, or maybe the doors in Metroid. Each of these fired a couple of shots as I approached, but those were easily dodged.

Once I destroyed the domes, the Supercomputer entered an emergency defense mode, where a central "eye" activated, and lasers began spewing forth from the central core. The lasers were fired in a tight interval, leaving very little room to get between them, though the eye in the center was the weak point. So the only way to finish the Supercomputer off was to get between the lasers, fire a single shot up into the central core, and back out. I probably used up a few medpacks here, but after several shots, I managed to destroy the Supercomputer.

I wonder what the rest of it looks like.
They forgot to give it wheels.

But at least they gave it lasers...
Not that they helped much.

Couldn't you have parked the chopper closer?
Teeny-tiny staff roll!

With the mission successfully completed, Masato and Mizuki returned to their rendezvous point with the exploding ruins of the enemy fortress behind them. Thus, the world was most likely saved.

But you know what? I don't think the story is quite over for these two. Check back later for the further adventures of Masato and Mizuki!

Wednesday, November 25, 2009

RGR Game #014: Fortified Zone

Aww, they broke the logo!
They're slow to react, I guess.

All right, folks, next up on our list is Fortified Zone for the Game Boy. I remember being so excited about this game when I saw a preview of it in Nintendo Power or some other magazine. But I guess I wasn't excited enough, because I never did get around to playing it. The game is called Ikari no Yousai (Fortress of Fury) in Japan, where I recently learned there was a sequel that never made it to the US; there was another sequel for the Super NES that was released here, titled Operation Logic Bomb. I'll probably be adding those two to my list pretty soon.

The story follows two mercenaries named Masato and Mizuki as they infiltrate a mysterious enemy stronghold, fighting soldiers, mutants and robots along the way. One interesting feature I should note is that the game allows you to switch between the two characters at any time on the pause screen, and they have their own special abilities: Masato can handle the enemies' special weapons while Mizuki has the ability to jump over spikes (an ability that I admittedly didn't find out about until after I had finished the game). This allows for a little bit of strategy amongst all the carnage and mayhem.

There's also a ridiculously detailed sound test mode called Sound Boy, but I only spent enough time with the mode to put together the one animation below.

Masato & Mizuki: Mega Mercenaries!
Dance, Sound Boy, dance!

How'd they fit that through the door?
You know, spike traps are awfully silly.

At least they're not heat-seeking.
I wonder where the boss is.

Each stage (or each floor of each stage) is laid out on a 5x5-screen grid, and the goal is generally to hunt down one or more larger enemies to obtain keys needed to get through one or more locked doors that eventually lead to the boss. Some rooms are divided by walls and can have multiple entrances from one direction, so navigation isn't quite so straightforward. Basically, each stage is a simple maze, and you make a map as you go along. There are also some tricks, like fake walls (identified by their missing shadows), pitfalls and dark rooms.

Stage one, the Field stage, introduces some of the soldier-type enemies, such as "guy with gun", "guy with three-way gun", and "guy with knife". The larger enemies include jeeps with rear-mounted guns and complex multi-barrel gun turrets that strangely only fire one shot at a time.

First Boss: Gun Battery

Inside the large black-floored boss room, three large gun turrets sit on raised platforms, ready to shoot if you wander into their line of fire. This would be a fairly scary thought if you didn't realize that they're only capable of aiming at 45-degree angles. Of course, people of the era were only able to aim at 90-degree angles, but people are smaller targets than great big gun turrets. Because of this, I was easily able to move from gun to gun, putting myself in a position that kept me out of the gun's line of fire, but keeping the gun in mine. I picked the guns off one at a time, and it was on to stage two, the Jungle stage.

This is what we call a "safe spot".
So was this.
So was this.

I remember these things from Zelda!
Another Jeep? Do they build these in the rooms?

Stage two was laid out in a similar fashion to stage 1, though the textures were a bit different. There was no apparent jungle foliage, but everything was a little dirtier. The traps had expanded to include the sliding dagger blocks you see above, and as I recall, some of the enemies had improved body armor that could withstand multiple shots. Beyond that, though, not much had changed.

Second Boss: Tank

The tank's main cannon, much like the gun turrets, was only able to fire at 45-degree angles. However, the tank was much more dangerous because it could actually move. It would erratically roll back and forth, aiming and firing when possible. To make it trickier to line up shots from the side, two smaller guns were mounted on either side of the tank's rear. My strategy was to get in front of it, but not directly in front of the cannon, and open fire until it started to approach. I accidentally destroyed the right side-mount gun in the process, though I'm not complaining. Once the main cannon was gone, I just trotted up and annihilated the left gun to finish the tank off.

This seems like an unbalanced fight.
Unbalanced in my favor, that is!

Who keeps attack bats?
Does this thing have a moustache?

Stairs... so this place has two floors?
Wow, those medpacks are adding up.

So... confused...
So... confused...
Mutant crab people! Run!!!

Stage three, the Cave stage, was where things started getting strange. Not only was it the first stage with two floors, but it introduced all sorts of strange creatures as enemies. I ran into bats with 8-way shot capability, giant one-eyed armored insect things, and the weird man-dog-crab hybrid above. Some rooms began with inverted controls, thanks to some kind of brain-scrambling device the enemy has developed. Luckily, overcoming the controls is easy, and destroying the device reverses the effects.

Third Boss: Dragon

You heard me right. It's a dragon. It breathes fire and everything. Its pattern consists of moving left or right to a certain spot, shooting three fireballs in a wide pattern, then moving left or right again, and then charging with its head flailing back and forth. After a brief pause, it slowly walks back to the top of the screen and starts again. The fireballs aren't that fast, but they're bigger than any other weapon so far, so it pays to be careful when running from or dodging them. The dragon's weak spot is its head, and it can take a lot of damage before it finally dies. With some patience, though, it's not a difficult boss.

Whoa, I was not expecting this.
Sorry, Mr. Dragon, but business is business!

Next stop: stage four, the Fortress!

Saturday, November 21, 2009

RGR Game #013: Ninja Spirit


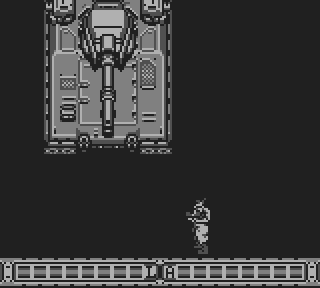
As promised, the next game is Ninja Spirit, for the TurboGrafx-16. According to most accounts, the story revolves around a ninja seeking vengeance for his father who was slain by an evil spirit. This isn't entirely accurate, though. In truth, the main character is a magical white wolf named Tsukikage, who assumes the form of the fallen ninja in order to exterminate the evil presence that killed him.

Tsukikage comes equipped with four different weapons: a katana called Righteous Cloud, shuriken called Swirling Leaf, bombs called Bamboo Thunder, and a kusarigama named Rising Dragon. Don't ask me why anyone would name their bombs. In addition to the standard weapons, upgrades are available which add range, power, and other special abilities to Tsukikage's weapons, as well as special power-ups that create clones that follow Tsukikage and allow significant attack advantages.

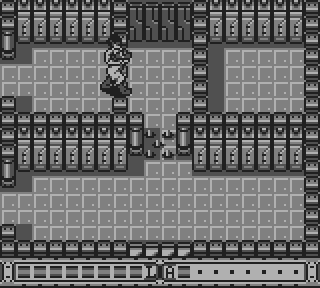
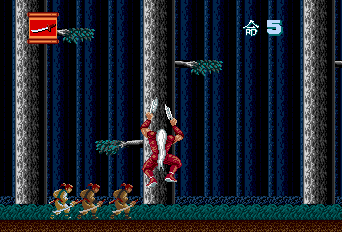
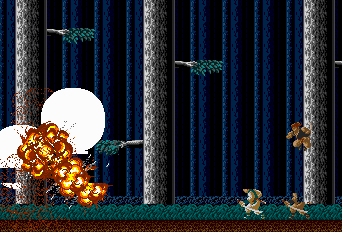
The game is a simple side-scrolling platformer with lots of evil ninjas, monks, and the occasional evil flying wolf trying to bring you down. There is a vertical stage, though, where you scale a mountain by jumping from outcropping to branch and vice-versa, and also a couple of areas where jumping high enough causes you to begin walking on the ceiling. But even then, you're still fighting the same few enemies, so I'll be concentrating on the large and sometimes ridiculously difficult bosses.

The Ninjaville High Eagles have ninja spirit!
He should have ducked.

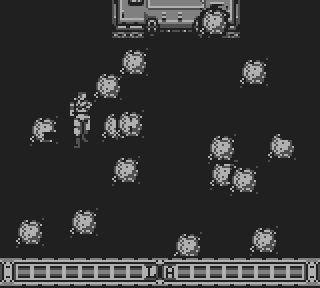
Ooh, sparkly... GWOOORGH!!!
This'd go great on a T-shirt.

First Boss: Ashura

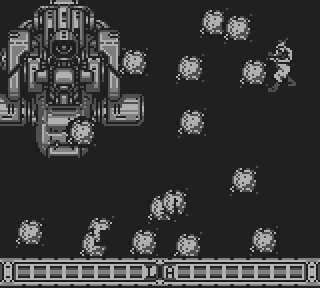
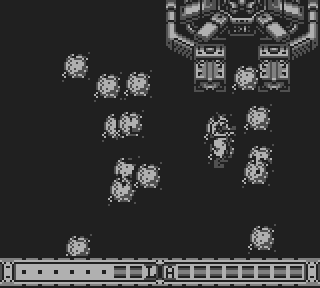
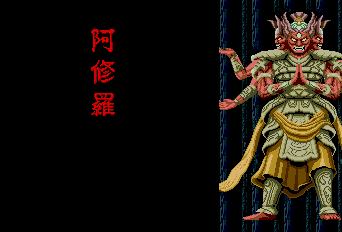
The battle with Ashura is prefaced with an assault by several groups of ninjas, who leap high into the air, throw a few shuriken, and then sink back into the ground. Luckily, the powered-up form of Righteous Cloud coupled with some clones makes me pretty much impervious to their attacks. Finally, after the ninjas have cleared out, Ashura rises up from the ground to get the actual boss battle started.

He's too large to actually move around, so his attacks consist entirely of summoning lightning bolts, which he then splits into little balls of energy that fly off in eight directions. Without power-ups, this might be a difficult fight, since his weak point is his head, and he uses four of his six hands to summon lightning at different points on screen. Luckily, I was fully powered up, so not only could his attacks not reach me, but I was also able to position a floating clone right next to his head to repeatedly attack him.

Left-hand ninjas don't concern me.
Do you think he even notices me?

Second Boss: Soufuki

His name means "twin-axed demon", and that sounds about right, as Soufuki wields twin axes, leaping directly at unsuspecting ninja wolves to chop them up. He moves from tree to tree, trying to find that perfect angle from which to corner and trap you, and he's fairly quick. Since he's always on your tail, defeating him requires a lot of careful footwork, basically dodging him and letting any clones you might have do all the attacking.

That tree won't save you. We jump high.
See?
See?

Third Boss: Makai Hanzou

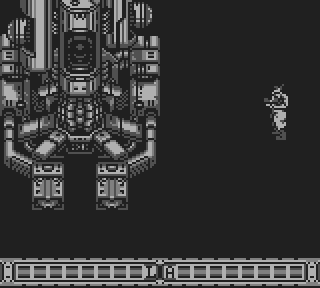
I'm not sure if this is supposed to be Hattori Hanzou himself, but it's definitely a very large ninja who's been summoned from Hell to get in my way. And you know he's there to cause trouble, since he's got a sword with a blade that's taller than I am. Good thing he's still a bit groggy from his eternal slumber, because it makes him slow to react and easy to jump over. So the battle plan is simple: let him get sort of close, then jump over him and use your clones to lay into him for a while. Once he starts getting close again, jump back and repeat. Easy peasy!

How do we deal with a 6-foot blade?
Surprisingly well.
Surprisingly well.

Fourth Boss: Jubakuseki

At the end of the first ceiling-walking stage, we encounter the Jubakuseki, or Cursed Stones. These two large square stone blocks slide around their cramped little room, constantly trying to crush anyone who dares enter. They do adhere to a couple of convenient rules, though, that make them less of a threat. First, only one stone moves at any given time. Second, they can only move horizontally or vertically, never diagonally. And as a possible third, they seem to always alternate movements, which makes them fairly predictable. Besides, they don't really move that fast, and we can just about jump to the ceiling, so we've got the maneuverability advantage.

Great, so now gravity's an enemy too?
These are special ninja rocks.

Fifth Boss: Fuuma Kyuuninshuu

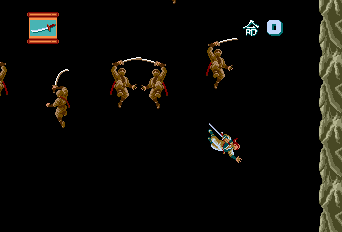
This gang of nine ninjas from the Fuuma clan arrives on a giant kite, and they seem to think it's wise to all stay strapped to that kite, throwing various ninja implements at us. Each of them can take a good bit of damage before finally vanishing, but the only one who really matters is the guy in the middle, the leader of the group. Since he doesn't attack, it's easiest to get rid of the rest of them first and then take him out in peace. The fight can get a little hectic if several of them decide to throw things at you all at once, but as usual, the powered-up form of Righteous Cloud protects me from everything they've got, so it's really not a tough fight at all.

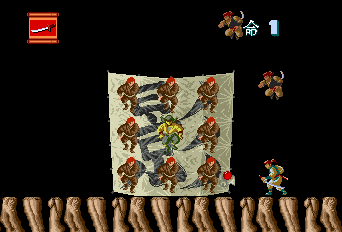
You guys look silly strapped to that kite.
That's a bit better.

Sixth Boss: Ochimusha Reigun

DO NOT WANT.

This boss consists of a number of fallen warriors (the "ochimusha" part), reanimated in groups of up to three. Each appears right where you're standing at that moment, so you constantly have to watch your step, or you'll be on the receiving end of a surprise zombie blade before you know it. I lost count of how many times I died in this fight, and looking back, I probably should have used a ranged weapon like Bamboo Thunder instead of relying on my sword so much. Eventually, though, I was able to defeat enough of them to run their supply dry.

The final stage is another gravity-defying ceiling walk stage, this time set in a dark cave full of powerful samurai types who can follow you to the ceiling, are quite quick, and kill with one hit. Needless to say, the stage was tough. And to make matters worse, the cavern dead-ends above a seemingly bottomless pit, where the souls of ninjas rise from the depths with their swords drawn, killing on contact. This was the single biggest life-waster of the entire game, and in an arcade setting, would have cost a stupid amount of money to get through. There's a pattern though, and an area where no ninjas ever appear toward the left side of the screen. After dozens of deaths, I finally found the spot and was able to glide safely to the bottom of the pit, which it turns out leads straight to Hell.

Ninja zombies! Or is it zombie ninjas?
Neither!
Neither!

I sense much evil in this cave.
Ack, there it is!
Ack, there it is!

Final Boss: Daisokushinbutsu

At the bottom of the pit, a very large and powerful old monk awaited my arrival. He was a Sokushinbutsu, a very disturbing kind of monk who attempted to achieve Buddhahood by causing his/her own mummification. This one looked to have been physically successful, but I guess the process turned him evil, because he's the source of all the bad stuff that's been happening. In fact, his main method of attack is the exact same sparkly magic that killed the ninja in the game's opening.

The spark trails follow you around the room, forcing you to jump around roughly in a figure-eight pattern, attacking whenever you're both close enough and high enough. But they're fast, and he's always creating new ones, so it's easy to get caught off-guard. This is another fight where I regret not using a ranged weapon, but after several failed attempts, I managed to stay alive long enough to take him down using Righteous Cloud.

So YOU were the one who made those sparkly things!
Well, I'll be putting a stop to that!

With Daisokushinbutsu destroyed, his control over the ninja of the land ceased, and peace returned to the land. Thus, Tsukikage was free to return (albeit seemingly painfully) to his original wolf form until his powers are needed again. Three cheers for Tsukikage!

This is kind of painful to watch.
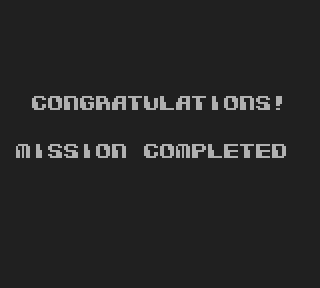
No staff roll, but here's your ending!

All right! Well, that was a nice quick one, wasn't it? The next game is still a bit up in the air, but I've got a few ideas. Stay tuned!